Photobooth
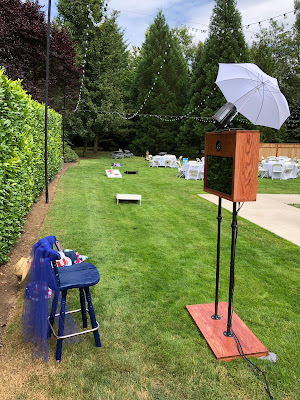
My latest side gig has been photo boothin'. At the request of my cousin a year back, I built a custom unit that would be cheaper than buying a kit, and about the same cost as renting one out. Why pay someone to do something when you can do it in a much longer and painful way yourself!
Okay, back to the project. This isn't the first photo booth I have built. A few years back I threw together a unit made out of a electrical distribution box, a surface tablet, and a Canon SLR. It got the job done but was slow and buggy due to how I configured it. This was my chance to redeem myself and build it the way I wanted to.
For this build, I wanted the screen to be the focus. It needed to be large and have a capacitive touch screen. Luckily large touch screens have plummeted in price and Dell had the perfect solution. To make it work thought I would have to build my own box. Just to preface the rest of the build, I did get a B+ in my Jr. High Woodshop I class. They knocked me down for my attention to detail but you can't argue with the results.
I choose to use a hard wood for this booth since it needed to be sturdy, resistant to basic wear a tear, and it needed to take a stain well. I built a basic box that I added grooves in for the front and back of the box. The back needed to be easily removable to access the components of the booth and to turn it on.
The stand was the tricky part of this build. Two things needed to happen in order for it to be effective. It needed to be very sturdy to hold up around 30lbs, and it needed to be able to disconnect easily for transportation. Galvanized steel piping looked like the best solution. I liked the industrial look it gave the photo booth and it was resistant to lots of abuse. The height was determined by where the camera would end up above the screen. I wanted it to be roughly at my eye level. I would use a tripod mount inside to angle it down slightly for the ideal angle.
Tada! I made it look so easy. In the last year I have taken it to about 10 events. I usually charge a small fee just to help pay for the unit and to pay for the software updates on the photo booth software I use. Its a fun thing to have around and was almost as fun to build... almost...


Comments
Post a Comment